Overview
Learn how to export files from Microsoft OneDrive, a cloud storage service that's part of Microsoft 365.
How to Access OneDrive
OneDrive is available by going to Office 365 and signing in with your UO email address, then clicking on the OneDrive tile.
OneDrive is also available as an application for Windows and Mac computers. For the purposes of this guide, the instructions below outline the process for using OneDrive on the web to back up your files.
Exporting Files
Windows Users: On Windows computers where you are signed into your UO Microsoft account, OneDrive may be configured to automatically save files to OneDrive instead of saving files to your computer's internal storage. To prevent files exported using this guide and new files from being saved back into OneDrive where they will be subject to deletion, we recommend following our instructions for
Disabling OneDrive Auto-Sync.
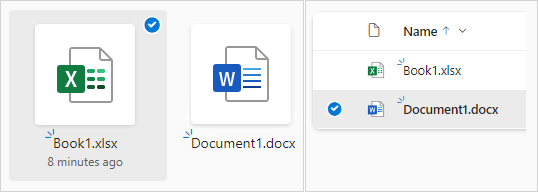
To select individual or multiple files:
Select each item by going to My Files then selecting the circular check box that appears next to each file. (The right image below shows items in List view, and the left image shows items in Tiles or Photos view.) You can also select several files at once by selecting one file, scrolling down the list, then hold down the Shift key while left-clicking the last item you want to select, which will select all files between the two, or by holding the CTRL (on Windows) or command ⌘ (on macOS) key and clicking on each file you wish to select.
To select all files in a folder
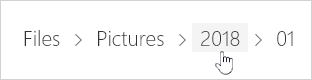
Select the circle to the left of the header row, or press CTRL+A (on Windows) or ⌘+A (on macOS) simultaneously on your keyboard. To select a folder, rather than just its contents, you may need to go up or back a level to select the whole folder.
- Example: You can select a different location in the hierarchy by selecting it.
- Second example: You can select a folder rather than just its contents.

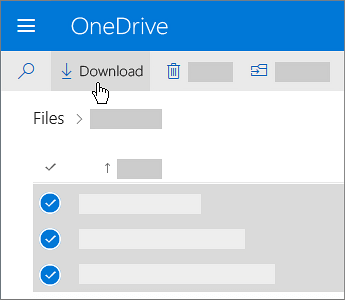
To save the selected files
In the top navigation, select Download. (You can also right-click on the file, photo, or folder, and select Download.)
If your browser prompts you, choose Save or Save As and browse to the location where you want to save the download. (Some browsers will save right away to a Downloads folder on your computer automatically.)
Notes
- The Download button will only appear when files or folders are selected.
- The Download button may sometimes disappear if you refresh the web page while looking at a folder. To work around this, you can go up one level in the folder directory and come back, or close that tab in your browser and navigate to the folder again.
- If you select multiple files or folders and then select Download from Microsoft OneDrive, SharePoint in Microsoft 365, or from SharePoint Server Subscription Edition, your browser will start downloading a .zip file containing all the files and folders you selected. If you're in a folder and you select Download without selecting any files or folders, your browser will begin downloading all contents of the folder.
- You can use Microsoft Edge or Google Chrome to download folders or multiple files.
- Downloads are subject to the following limits:
- File size limit: 250 GB
- Total number of files limit: 10,000 files
- Folder size limit: 10,000 files
- If you download multiple compressed files, such as ZIP files or MP4 files, the size limit is 10 GB per ZIP file and 20 GB overall.
Note: Creating new files in Microsoft Office applications, particularly files created in Office Web Applications and/or files with the Autosave function turned on, may continue to be saved in OneDrive. We recommend exploring and transitioning to using an
alternative Office software option ahead of losing access to Microsoft Office through UO.
Disabling OneDrive Auto-Sync on Windows Computers
On Windows computers where you are signed into your UO Microsoft account, OneDrive may be configured to automatically save files to OneDrive instead of saving files to your computer's internal storage. To prevent files exported using this guide and new files from being saved back into OneDrive where they will be subject to deletion, we recommend disabling OneDrive auto-sync.
Disabling Auto-Sync
- Open File Explorer.
- Find your University of Oregon OneDrive file location (see the image below for an example).

- Right-click on the University of Oregon OneDrive location, then in the options menu navigate to OneDrive > Settings.

- In the OneDrive Settings menu, navigate to the Sync and backup tab and click Manage backup.

- Slide all folder toggles to the Off position, then click Save Changes.
If all toggles are turned off, then your computer is configured to not sync files to your UO OneDrive account.